Spring Boot精华 开发人员必备
- 首先我们对spring Boot做一个认识,它是什么?有什么用?我们为什么要学习?
spring boot是用来简化spring初期的环境搭建以及开发发过程,以提高我们的开发效率,那么它目前为什么这么火?相比以前我们学的spring简化了多少,接下来我就为大家阐述下?
<1>spring boot入门
a:创建Maven项目 b:导入spring boot依赖
添加spring-boot-starter-web依赖
org.springframework.boot
spring-boot-starter-web
<build>
    <plugins>
        <plugin>
            <groupId>org.springframework.boot</groupId>
            <artifactId>spring-boot-maven-plugin</artifactId>
        </plugin>
    </plugins>
</build>
c:我们可以写一段代码测试一下
c:热部署
即使修改了输出内容也要重启APP,非常麻烦!可以使用spring-boot-devtools来实现!
1)介绍
spring-boot-devtools 是一个为开发者服务的一个模块,其中最重要的功能就是自动应用代码更改到最新的App上面去。原理是在发现代码有更改之后,重新启动应用,但是速度比手动停止后再启动还要更快,更快指的不是节省出来的手工操作的时间。
其深层原理是使用了两个ClassLoader,一个Classloader加载那些不会改变的类(第三方Jar包),另一个ClassLoader加载会更改的类,称为 restart ClassLoader
,这样在有代码更改的时候,原来的restart ClassLoader 被丢弃,重新创建一个restart ClassLoader,由于需要加载的类相比较少,所以实现了较快的重启时间(5秒以内)
2)使用
添加依赖包:
org.springframework.boot
spring-boot-devtools
true
2. spring boot web springboot搭建web项目非常简单,和springmvc的使用方式类似,但是启动方式和配置方式有区别
a:引入
前面我们使用Spring Boot能往浏览器中输出一个字符串!实际上我们需要的是跳转到一个页面或者获取一个Json数据。那怎么实现呢?
b:跳转jsp
步骤:
创建Maven web project
引入依赖
配置application.properties对jsp支持
org.apache.tomcat.embed
tomcat-embed-jasper
provided
   编写测试Controller
   编写JSP
   编写启动App
b:配置properties对jsp的支持
添加src/main/resources/application.properties:
#tomcat server port
server.port=80
页面默认前缀目录
spring.mvc.view.prefix=/WEB-INF/jsp/
响应页面默认后缀
spring.mvc.view.suffix=.jsp
自定义属性,可以在Controller中读取
application.hello=Hello Angel From application
Yaml 方式
server:
port: 8080
name: kd
spring:
mvc:
view:
prefix: /WEB-INF/jsp/
suffix: .jsp
测试:
@Controller
public class HelloController {
@RequestMapping("/hello")
public String helloJsp(Model model){
System.out.println(“HelloController.helloJsp().hello=hello”);
model.addAttribute(“hello”, “你好”);
return “hello”;
}
}
编写jsp:
在 src/main 下面创建 webapp/WEB-INF/jsp 目录用来存放我们的jsp页面:helloJsp.jsp:
<%@ page language=“java” contentType=“text/html; charset=UTF-8”
pageEncoding=“UTF-8”%>
${hello} 编写启动app 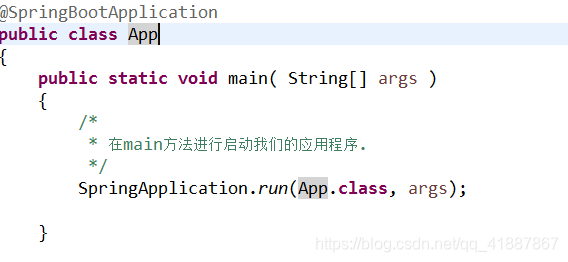3. spring boot持久化 支持原生jdbc、也支持mybatis和jpa a: 引入spring-boot-starter-jdbc 那么只需要在需要使用的类中加入: @Resource private JdbcTemplate jdbcTemplate; b: 引入maven依赖mysql,jdbc mysql mysql-connector-java org.springframework.boot spring-boot-starter-jdbc org.springframework.boot spring-boot-starter-test c:在数据库中配置信息 spring.datasource.driverClassName = com.mysql.jdbc.Driver spring.datasource.url = jdbc:mysql://localhost:3306/test spring.datasource.username = root spring.datasource.password = root
Yaml 方式
spring:
datasource:
driverClassName: com.mysql.jdbc.Driver
url : jdbc:mysql://localhost:3306/spring-boot-demo?useUnicode=true&characterEncoding=utf-8
username : root
password : root
4. spring boot - spring data jpa
a: 引入maven依赖mysql,springdatajpa
mysql
mysql-connector-java
																spring.datasource.url = jdbc:mysql://localhost:3306/test
																spring.datasource.username = root
																spring.datasource.password = root
																spring.datasource.driverClassName = com.mysql.jdbc.Driver
																spring.datasource.max-active=20
																spring.datasource.max-idle=8
																spring.datasource.min-idle=8
																spring.datasource.initial-size=10
-
spring boot - mybatis
a: 集成mybatis
(1)新建maven project;
新建一个maven project,取名为:spring-boot-mybatis
(2)在pom.xml文件中引入相关依赖;
(1)基本依赖,jdk版本号;
(2)mysql驱动,mybatis依赖包,mysql分页PageHelper:
org.springframework.boot
spring-boot-starter-web
mysql
mysql-connector-java<!-- spring-boot mybatis依赖 --> <dependency> <groupId>org.mybatis.spring.boot</groupId> <artifactId>mybatis-spring-boot-starter</artifactId> <version>1.3.0</version> </dependency> <!-- spring boot mybatis 分页插件 --> <dependency> <groupId>com.github.pagehelper</groupId> <artifactId>pagehelper-spring-boot-starter</artifactId> <version>1.2.2</version> </dependency>
(3)创建启动类App.java
@SpringBootApplication
@MapperScan(“cn.itsource.springboot.mybatis.mapper”)
public class App
{
public static void main( String[] args )
{
SpringApplication.run(App.class, args);
}
}
//这里和以往不一样的地方就是MapperScan的注解,这个是会扫描该包下的接口
(4)在application.properties添加配置文件;
#tomcat server port
server.port=80
########################################################
###datasource
########################################################
spring.datasource.url = jdbc:mysql://localhost:3306/test
spring.datasource.username = root
spring.datasource.password = root
spring.datasource.driverClassName = com.mysql.jdbc.Driver
spring.datasource.max-active=20
spring.datasource.max-idle=8
spring.datasource.min-idle=8
spring.datasource.initial-size=10
(5)编写User测试类;
package cn.itsource.springboot.mybatis.domain;
import java.io.Serializable;
public class User implements Serializable {
private static final long serialVersionUID = -2107513802540409419L;
private Long id;
private String name;
getter/setter...
}
(6)编写UserMapper;
注解方式 :
package cn.itsource.springboot.mybatis.mapper;
import java.util.List;
import org.apache.ibatis.annotations.Select;
import cn.itsource.springboot.mybatis.domain.User;
@Mapper
public interface UserMapper {
@Select(“select * from t_user t_user name = #{name}”)
List likeName(String name);
@Select("select * from t_user where id = #{id}")
User getById(long id);

@Select("select name from t_user where id = #{id}")
String getNameById(long id);
}
XML方式:
package cn.itsource.springboot.mybatis.mapper;
import java.util.List;
import cn.itsource.springboot.mybatis.domain.User;
public interface UserMapper {
List likeName(String name);
User getById(long id);
String getNameById(long id);
}
然后在resources下增加mapper.xml文件
/cn/itsource/springboot/mybatis/mapper/UserMapper.xml
最后需要在application.properties中增加别名包和mapper xml扫描包的配置
Mybatis config
mybatis.typeAliasesPackage=cn.itsource.springboot.mybatis.domain
mybatis.mapperLocations=classpath:mapper/*.xml
#Yaml 配置
Mybatis配置
mybatis:
typeAliasesPackage: cn.itsource.domain
mapperLocations: classpath:cn/itsource/dao/mapper/*.xml
(7)编写UserService
package cn.itsource.springboot.mybatis.service;
import org.springframework.beans.factory.annotation.Autowired;
import org.springframework.stereotype.Service;
import cn.itsource.springboot.mybatis.domain.User;
import cn.itsource.springboot.mybatis.mapper.UserMapper;
@Service
public class UserService {
@Autowired
private UserMapper userMapper;
public User get(Long id){
	return userMapper.getById(id);
}
}
(8)编写UserController;
package cn.itsource.springboot.mybatis.controller;
import org.springframework.beans.factory.annotation.Autowired;
import org.springframework.web.bind.annotation.PathVariable;
import org.springframework.web.bind.annotation.RequestMapping;
import org.springframework.web.bind.annotation.ResponseBody;
import org.springframework.web.bind.annotation.RestController;
import cn.itsource.springboot.mybatis.domain.User;
import cn.itsource.springboot.mybatis.service.UserService;
@RestController
public class UserController {
@Autowired
private UserService userService;

@RequestMapping("/user/{id}")
@ResponseBody
public User get(@PathVariable Long id) {
	return userService.get(id);
}
}
6. 使用pageHelper分页
在application.properties中配置分页插件
#pagehelper.
pagehelper.autoDialect=true
pagehelper.closeConn=true
在调用mapper的前面开启分页功能
package cn.itsource.springboot.mybatis.service;
import java.util.List;
import org.springframework.beans.factory.annotation.Autowired;
import org.springframework.stereotype.Service;
import com.github.pagehelper.PageHelper;
import com.github.pagehelper.PageInfo;
import cn.itsource.springboot.mybatis.domain.User;
import cn.itsource.springboot.mybatis.mapper.UserMapper;
@Service
public class UserService {
@Autowired
private UserMapper userMapper;
public User get(Long id){
	return userMapper.getById(id);
}

public PageInfo<User> likeName(String name,Integer p) {
	PageHelper.startPage(p, 1);
    List<User> users = userMapper.likeName(name);
	return new PageInfo<>(users);
}
}