windows系统
1.下载并安装nginx,http://nginx.org/en/download.html
2.解压,并修改conf目录下nginx.conf配置文件
http {
#设定mime类型,类型由mime.type文件定义
include mime.types;
default_type application/octet-stream;
#设定日志格式
log_format main '$remote_addr - $remote_user [$time_local] "$request" '
'$status $body_bytes_sent "$http_referer" '
'"$http_user_agent" "$http_x_forwarded_for"';
access_log logs/access.log main;
#sendfile 指令指定 nginx 是否调用 sendfile 函数(zero copy 方式)来输出文件,
#对于普通应用,必须设为 on,
#如果用来进行下载等应用磁盘IO重负载应用,可设置为 off,
#以平衡磁盘与网络I/O处理速度,降低系统的uptime.
sendfile on;
#tcp_nopush on;
#连接超时时间
#keepalive_timeout 0;
keepalive_timeout 65;
tcp_nodelay on;
#开启gzip压缩
gzip on;
gzip_disable "MSIE [1-6].";
#设定请求缓冲
client_header_buffer_size 128k;
large_client_header_buffers 4 128k;
#设定虚拟主机配置
server {
#侦听80端口
listen 80;
#定义使用 www.nginx.cn访问
server_name www.nginx.cn;
#定义服务器的默认网站根目录位置
root html;
#设定本虚拟主机的访问日志
access_log logs/nginx.access.log main;
#默认请求
location / {
#定义首页索引文件的名称
index index.php index.html index.htm;
}
# 定义错误提示页面
error_page 500 502 503 504 /50x.html;
location = /50x.html {
}
#静态文件,nginx自己处理
location ~ ^/(images|javascript|js|css|flash|media|static)/ {
#过期30天,静态文件不怎么更新,过期可以设大一点,
#如果频繁更新,则可以设置得小一点。
expires 30d;
}
#PHP 脚本请求全部转发到 FastCGI处理. 使用FastCGI默认配置.
location ~ .php$ {
fastcgi_pass 127.0.0.1:9000;
fastcgi_index index.php;
fastcgi_param SCRIPT_FILENAME $document_root$fastcgi_script_name;
include fastcgi_params;
}
#禁止访问 .htxxx 文件
location ~ /.ht {
deny all;
}
}
}
其实看了那么多,只是想让大家多了解点nginx知识,
下面介绍简单实用的操作方法:
直接在

写入你存放资源的路径,
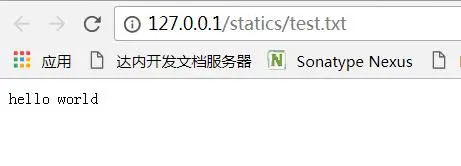
在浏览器中直接输入即将实现。

LINUX系统
1.安装依赖库
yum install gcc-c++
yum install pcre pcre-devel
yum install zlib zlib-devel
yum install openssl openssl-devel
2.检查是否已安装
find -name nginx
3.安装Nginx
wget http://nginx.org/download/nginx-1.7.4.tar.gz //下载压缩文件
tar -zxvf nginx-1.7.4.tar.gz //解压文件
cd nginx-1.7.4 //进入解压文件
./configure
make
make install //安装Nginx
4.启动Nginx
v1、启动:
/usr/local/nginx/sbin/nginx (修改文件要修改/usr/local/nginx/conf/nginx.conf)
v2、其他命令:
/usr/local/nginx/sbin/nginx -s [参数]
参数可以是下列之一:
stop — 快速停止
quit — 优雅停止
reload — 重新加载配置文件
reopen — 重新打开日志文件
5.设置防火墙状态
查看防火墙状态
firewall-cmd --state
关闭防火墙
systemctl stop firewalld.service
开启防火墙
systemctl start firewalld.service
6.测试,直接在windows下输入ip即可,conf下的nginx.conf配置和windows下的配置一样。
nginx详细介绍请参考:http://blog.csdn.net/zhaogangyyxf/article/details/79424392
